Vinyl Plotter & Cutter - Mimaki CG-130FX: Difference between revisions
Jump to navigation
Jump to search
(Created page with "End of Life vinyl cutter and plotter. The device has not yet been hooked up to any design workstation and is still in testing for general use. http://mimaki.com/product/cutti...") |
Matt5sean3 (talk | contribs) mNo edit summary |
||
| (6 intermediate revisions by 2 users not shown) | |||
| Line 1: | Line 1: | ||
[http://mimaki.com/archives/034/201301/CGFX_Operation_D200805_V2.0.pdf Manual] | |||
http://mimaki.com/product/cutting/c-roll/cg-fx-series/driver.html?driver=81072 | http://mimaki.com/product/cutting/c-roll/cg-fx-series/driver.html?driver=81072 | ||
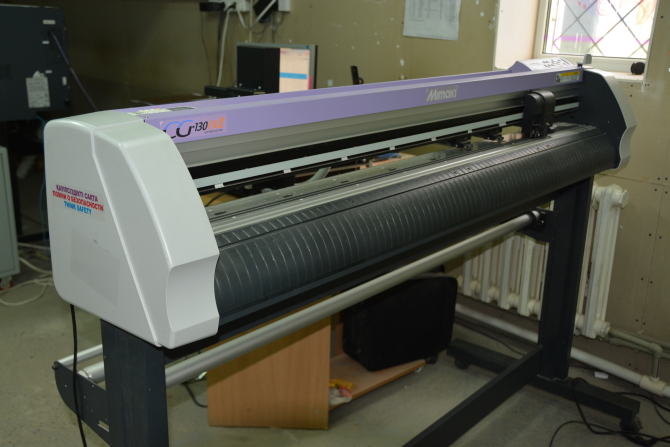
[[File:CG-130FX.png]] | [[File:CG-130FX.png]] | ||
[[category:equipment]][[category:design]][[category: | |||
== Instructions for Use == | |||
* Plug in usb cable into PC (The 3D design station computer is right next to it) | |||
* Power on computer and cutter | |||
* Wait for cutter to load / buffer | |||
* Press the left arrow button to set the cutter to use | |||
* Press "End" when TP1 shows on the LCD panel | |||
* Press / hold the up/down left/right arrow keys to move origin | |||
* Press "Enter / HOLD" to set origin point | |||
* Press "Remote On" to toggle computer control of the cutter | |||
== Setting up Vinyl Master == | |||
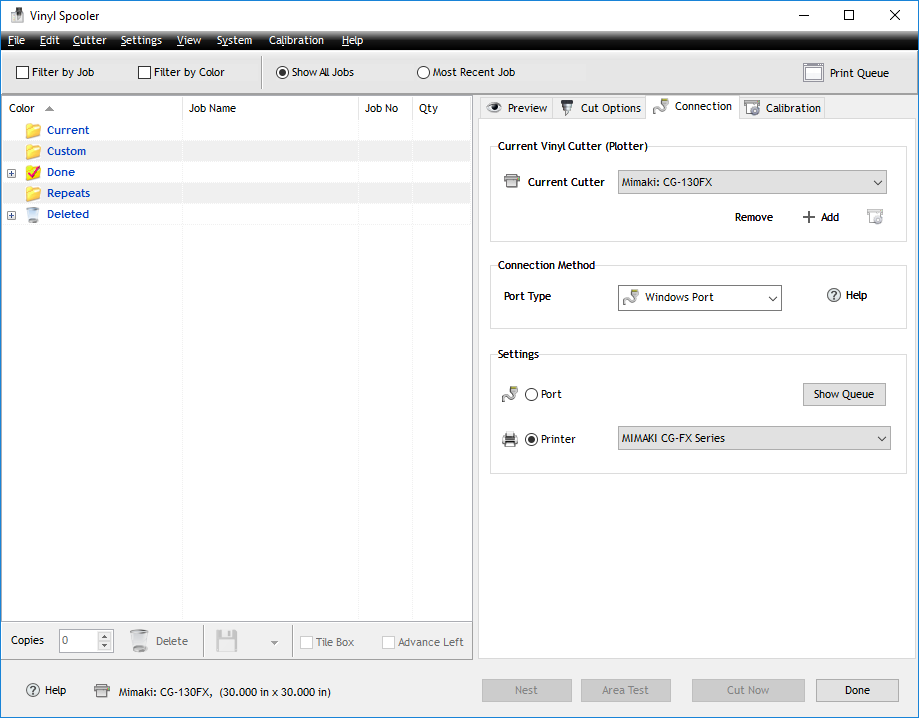
Under tools -> Plugins and Modules -> Vinyl Spooler -> Configuration Tab | |||
Ensure settings match this graphic: | |||
[[File:mimaki-settings.png]] | |||
== Notes / Potential Issue == | |||
* On boot up if you do not press left arrow when selecting vinyl roll it may spit the entire roll out | |||
* Auto cutting may not always work (may kick paper) | |||
[[category:equipment]][[category:design]][[category:Main Room]] | |||
Latest revision as of 18:51, 14 June 2017
http://mimaki.com/product/cutting/c-roll/cg-fx-series/driver.html?driver=81072
Instructions for Use
- Plug in usb cable into PC (The 3D design station computer is right next to it)
- Power on computer and cutter
- Wait for cutter to load / buffer
- Press the left arrow button to set the cutter to use
- Press "End" when TP1 shows on the LCD panel
- Press / hold the up/down left/right arrow keys to move origin
- Press "Enter / HOLD" to set origin point
- Press "Remote On" to toggle computer control of the cutter
Setting up Vinyl Master
Under tools -> Plugins and Modules -> Vinyl Spooler -> Configuration Tab
Ensure settings match this graphic:
Notes / Potential Issue
- On boot up if you do not press left arrow when selecting vinyl roll it may spit the entire roll out
- Auto cutting may not always work (may kick paper)

