Kramers tricopter step by step
Jump to navigation
Jump to search
Kramer's Documentation at end of day one 1/31/15 Tricopter Build
- Legs
 - sanded Legs
 - Assemble Motors
   - attach the bottom braket
     - get counter sink side correct
 - Attach 2 non-servo motors to legs
   - opposite side of screw holes
   - align wires with opening
   - use small cutout to enclose wires within leg slot
     - could glue
   - zip tie in place
   -
   - Zip tie and connect speed control
   - will need to determine direction after build by running the motor and noting direction so don't make permanent
   - photo 2
 - drill and file 3D printed gimble mount
   - use a screw and glue the end to make gimble pivot
   - photo 3
   - use super glue
 - screw motor on 3D printed mount
   - may need to drill to fit
   - align wires away from base end
   - photo4
 - Attach servo
   - use drill to reverse counter sink screw hole to get a flush connection
   - cut two edges of servo star to fit
   - ensure full range of motion and attach star to servo
   - superglue to gimble
   - photo5
 - Attach gimble and servo to leg
   - Found out I made a mistake in how the wires were aligned with cutout on leg
     - inscrewed and screwed
   - use zip ties
   - used super glue for spacer after zip tie
   - photo6
 - zip tie and connect speed controller
- Zip tie and connect speed control
- will need to determine direction after build by running the motor and noting direction so don't make permanent
- photo 2
- drill and file 3D printed gimble mount
- use a screw and glue the end to make gimble pivot
- photo 3
- use super glue
- screw motor on 3D printed mount
- may need to drill to fit
- align wires away from base end
- photo4
- Attach servo
- use drill to reverse counter sink screw hole to get a flush connection
- cut two edges of servo star to fit
- ensure full range of motion and attach star to servo
- superglue to gimble
- photo5
- Attach gimble and servo to leg
- Found out I made a mistake in how the wires were aligned with cutout on leg
- inscrewed and screwed
- use zip ties
- used super glue for spacer after zip tie
- photo6
- zip tie and connect speed controller

- Put the screws in a center piece and attach legs putting the gimbled leg in the center
 - use shorter 1 1/4 inch screw on inside for gimbled leg
 - attach so that the motors face down and the wires are accesable
 - photo7
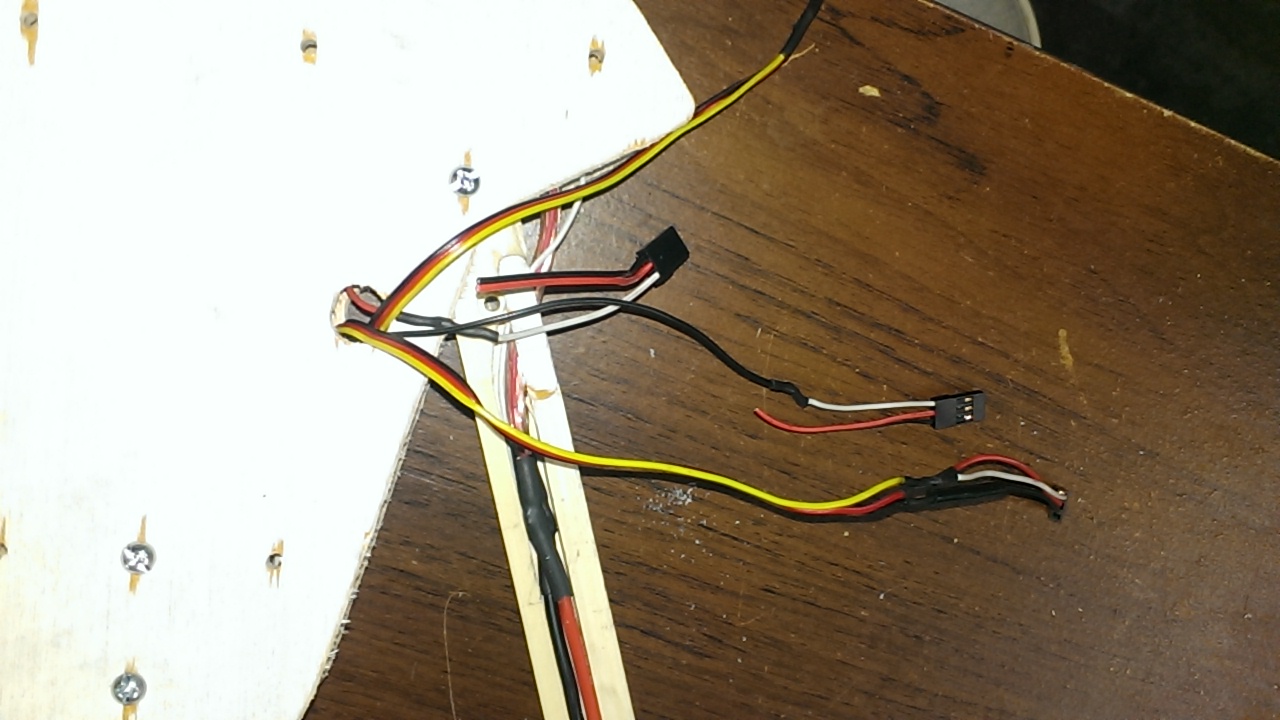
- connect wires together in middle using solder and speaker wire
 - pigtail all negative and positive from the speed controllers
   - cut and strip black and red wires
   - cut and strip speaker wire
   - cut shrink wrap and solder wire red to red black to black
   - photo8
   - lighter for shrink wrap
   - combine all neg and wire to neg for final wire
   - do the same for pos
   - don't forget skrink wrap(large)
 - Extend all control wires
   - only the white wire from the two legs without the gimble
   - all three from the gimble
   - leave about 4 inches past the hole through the center section to the top
   - takes a while; don't forget the shrink wrap
 - attach the top plate
   - I messed up the side I soldered the large wires and had to flip the legs to make the bottom plate the top
   - photo11
   - photo10