Print and Cut
The print & cut station is setup with Affinity suite, Inkscape, Gimp, and Adobe Acrobat. There is an Epson 6 color inkjet wide format printer and 24” Siser vinyl cutter set up with a cold roll laminator and Dahle rotary paper cutter. There is also a Brother ScanNCut 2 and large Mimaki cutter available for use. HackRVA supplies the printer ink and small amounts of vinyl inkjet sticker paper (Koala Matte) and over-laminate (Substance Icon PL-3150). Members are expected to provide their own supplies for large projects.
Printer
Cutters
- Siser_Romeo
- Brother ScanNCut 2
- Vinyl Plotter & Cutter - Mimaki CG-130FX
Laminator
Paper Trimmer
Feeds & Speeds

Table is for reference only. Please perform a test with your materials to verify before running a job.
| Decals | Kiss Cut | Die Cut | ||
|---|---|---|---|---|
| Speed | Pressure | Speed | Pressure | |
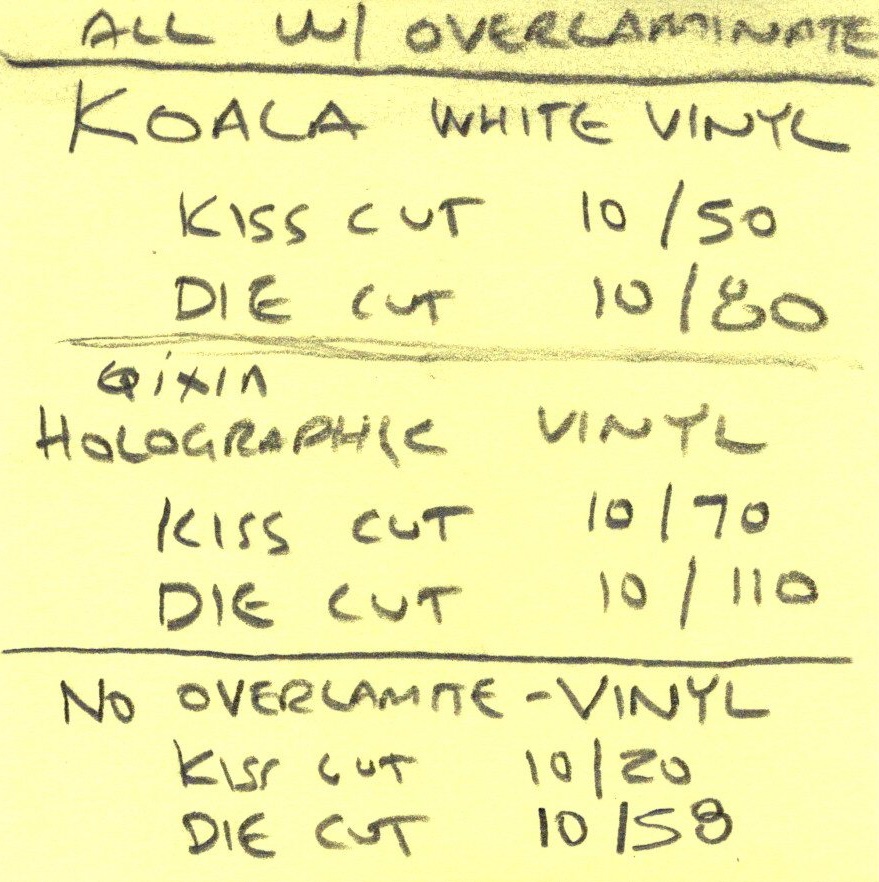
| Koala Matte Vinyl Sticker Paper | 10 | 20 | 10 | 58 |
| Koala Matte Vinyl Sticker Paper w/ Over-laminate | 10 | 50 | 10 | 80 |
| Qixin Holographic Vinyl Sticker Paper | 10 | 40 | 10 | 80 |
| Qixin Holographic Vinyl Sticker Paper w/ Over-laminate | 10 | 70 | 10 | 110 |
| Heat Transfer Vinyl | Kiss Cut | |||
| Speed | Pressure | |||
| Siser EasyColor DTV | 10 | 15 | ||
| TransOurDream Dark 1.0 | 10 | 15 | ||
Learn
Videos:
A Step By Step Guide in Sticker Making with Siser Cutters: https://www.youtube.com/watch?v=_sI2lz1M8PE
Leonardo Design Studio - Force Test Cut Feature with Siser Juliet or Romeo: https://www.youtube.com/watch?v=rFiz-m8cDw8
Mastering the Cold Roll Laminator: https://www.youtube.com/watch?v=NRrQTGRgKHU
Sticker Tips!
- When printing, ensure 'borderless' is enabled in print settings, and ensure that it will not resize the image on print. Dimensional accuracy matters or the Siser won't read the registration marks correctly. If you discover that the Siser is overshooting/undershooting the registration marks, this is likely the issue.
Heat Transfer Vinyl Tips
- For the TransOurDream HTV paper, start with 345 as the temperature, and adjust the heat press pressure so it takes some force to close the press on your workpiece, but you don't have to hang on it.
- 12-15 seconds is a good starting point for time. Too long and it can make the colors less vibrant as the ink burns. It can take a second to unlatch the heat press, so take that into account in your timing.