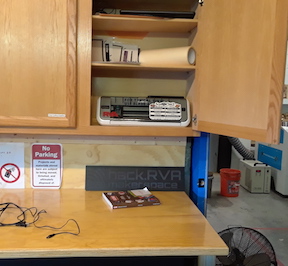
Vinyl Cutter - Brother Scan-N-Cut 2
Brother Scan-N-Cut Vinyl Cutter
Location:

[Manual][Quick Start]
Youtube: [How to make stickers]
Cutter, Chromebook and supplies are located in the cabinets in the main room above the counters, near the door to the laser room.
The Scan-N-Cut cuts 12" X 12" self-adhesive vinyl sheets. (hack.RVA supplies that for occasional use) When it is set correctly, it cuts the vinyl but not the backing. It can also cut paper, construction paper, and card stock. With a change of the head, it can cut fabric. For the design, it can take vector files, like SVG. You can make those with Inkscape (free download), Illustrator, or Vectr (free, online, https://vectr.com/) It can also scan, and then trace the shape to cut. High contrast original is best. This is done with the front panel.
Be sure to check the blade settings for the material you are cutting (chart in box, vinyl cutting uses the blade set on 3. Some vinyl may need 3.5 if it does not separate easily.) If the cutting mat is no longer sticky enough, it can be cleaned with antibacterial Wet Ones hand wipes. You cannot use baby wipes or anything with aloe to clean the mat.
Acer Chromebook login: [email protected] password: hackrvalogan
Vinyl cutting software is at http://scanncutcanvas.brother.com username:hackrva password:"cutter"
You can also download (free) Brother CanvasWorkspace app for Windows or MacOS. Create your own account for that.
Instructions
- Create your design in a vector program like Inkscape (free, Inkscape.com), Illustrator (not free), or Vectr (free, online). The final file must be SVG.
- Import your SVG file into Canvas Workspace, either online or in the desktop version. Workspace
- Some scaling and adjustment is possible. Your design must fit into 12" X 12".
- You can drive the cutter by a USB cable, or you can export a .fcm file, and use a USB drive to import into the cutter.
- The blade must be set to the right thickness. The blade holder can be lifted out, and turned to set the cut depth. For most self-adhesive vinyl, it should be at 3.5. If your cut does not easily separate, a higher setting is needed. If the backing is cut much, a lower setting is needed.
- There are reusable sticky mats in the cabinet. Place the material to cut on a mat, and rub it down to flatten. Put it inside the marked area. Use scraps if possible.
- If the cutting mat is not sticky enough, it can be cleaned with antibacterial Wet Ones hand wipes. Do not use baby wipes or anything with aloe to clean the mat.
- Put the cutter where there is about a foot of open room behind it. Plug in the power supply. Turn on the cutter. The switch is on the LCD panel. Open the clear front cover.
- Insert the mat with your material into the cutter, and press the top button on the right side of the screen. It will pull in the mat.
- Insert your USB drive, and import your .fcm file