PCB Etching Workshop
Preparing for the Workshop
- Make sure you've run through the workshop before the day of the workshop. There are many aspects
- This workshop is maximum of 8 people. If you only have 1 printer and/or 1 laminator consider reducing class to a size of 6.
Topics
- Overview of the process including alternatives
- Copper clad variations and acid options (including disposal)
- Transfer sheet and transfer method options
- Hands on making!
Steps
- Print design on paper and mock the board layout to make sure the print is scaled correctly and the mirroring is correct.
- Cut transfer paper about an inch oversized and tape it to the original print. Print again on the glossy side of the paper.
- Cut copper clad to approximate size - about an inch over sized again.
- Using painters tape, tape 1 or 2 edges of the transfer to the copper.
- Run through the laminator 5 - 10 times (until you're tired of doing it)
- Soak copper and transfer in water for a couple of minutes, then peel off the transfer.
- Use 2 sandwich bags and etch the board with ferric chloride
- Drill the holes using drill press or dremel press. (Find the right bits and make sure it works with dremel and drill press)
- Solder, Test, and Done!
Equipment & Supplies Needed for the Workshop
Maker sure you have the following:
- A working laser printer with good toner for printing image onto transfer paper.
- A computer for running the laser printer.
- PCB design artwork ready to be printed (and has been tested).
- Plenty of blue painters tape for securing paper to boards and paper to paper.
- Sufficient amount of toner transfer paper for class. Have extra for mistakes.
- Working laminator and clothes iron for applying heat during transfer process.
- A way to cut copper to correct size (shear(s) or table saw can work, have it ready in advance).
- Cleaning supplies to prepare copper; dish soap, sponge, paper towels, steel wool, fine-grit sandpaper (take your pick).
- Containers for soaking boards after toner transfer is complete (small tupperwares work well for this).
- Ferric chloride acid for etching boards.
- Nitrile gloves for handling acid.
- Sandwich bags for acid and copper (2 for each etch - double bag).
- Container for acid desposal or funnell for putting acid back in original container (depending on depletion).
- Correct size drill bits for hole drilling of PCB and fits available drill press.
- Marker or other item for fixing broken traces.
Here's a link to the equipment at hackrva for PCB etch: PCB_Making_Equipment
Here's a link to an order supply list for this workshop: https://docs.google.com/spreadsheets/d/13CzrknA-gje8imDsIwGcc6N7ohlUdvaHhMr8B-QhfR0/edit#gid=0
Other Tips:
- Make the traces and pads on the PCB artwork larger than needed to make etching easier.
Example Projects for Teaching
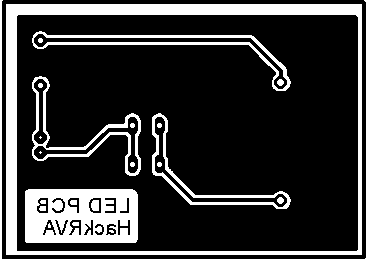
PCB Workshop Blinky 1
This is a simple LED board at about 2"x3" inches.
Parts List
- (1) Button
- (1) Battery Holder
- (1) Resistor
- (1) LED
